A Chainlist MetaMask Techedubyte Guide: How to Add EVM Networks to MetaMask via Chainlist
MetaMask is one of the most popular crypto wallets for users of decentralised apps, token trading, and blockchain networks. However, MetaMask only comes with the Ethereum Mainnet by default. If you need to use networks like Polygon, BNB Chain, Avalanche, Fantom, Arbitrum, or thousands of others, you have to add them manually.
This is where Chainlist makes life simple. Chainlist is a free online tool that lets users add verified EVM (Ethereum Virtual Machine) networks to MetaMask with one click. No typing. No mistakes.
What Is Chainlist?
Chainlist is a public directory of EVM networks that provides verified RPC details. It makes adding blockchain networks to your wallet quick and error-free.
Why People Use Chainlist
After you click “Add to MetaMask,” the network is installed with the correct:
- Network Name
- RPC URL
- Chain ID
- Block Explorer URL
How Chainlist Helps New Users
| Without Chainlist | With Chainlist |
|---|---|
| You search online for RPC data | No searching needed |
| You manually enter network fields | Auto-fills in MetaMask |
| Higher chance of mistakes | Almost zero error |
| Takes a long time | Takes 10–30 seconds |
What Is MetaMask in Simple Words?
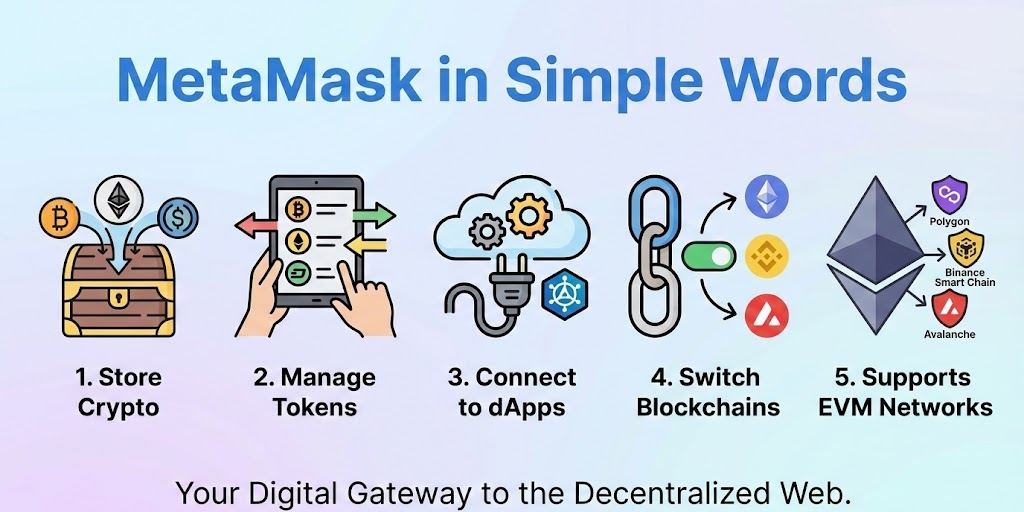
MetaMask is a digital wallet used to:
- Store crypto
- Manage tokens
- Connect to decentralised apps (dApps)
- Switch between multiple blockchains
It supports EVM networks, which means any blockchain compatible with Ethereum can be added.
Examples of EVM Networks You Can Add
- Binance Smart Chain (BNB Chain)
- Polygon
- Avalanche
- Fantom
- Arbitrum
- Cronos
- Celo
- Klaytn
- Gnosis
- Moonriver
- Hundreds more
MetaMask doesn’t ship with these networks, but you can add them manually or with Chainlist.
Why Use Chainlist Instead of Adding Networks Manually?
Manually adding a network means you have to type things like:
- Chain ID
- RPC URL
- Network Name
- Explorer URL
Typing errors can lead to:
- Tokens not showing
- Wrong blockchain connection
- Fake RPC URLs from random websites
- Lost time
Benefits of Using Chainlist
| Benefit | Why It Matters |
|---|---|
| Verified RPC details | Safer and more trustworthy |
| One-click setup | Fast and beginner-friendly |
| No typing needed | Zero spelling mistakes |
| Supports hundreds of networks | Useful for all DeFi users |
| Free to use | No subscription needed |
For beginners and experienced users alike, Chainlist is the easiest and safest approach.
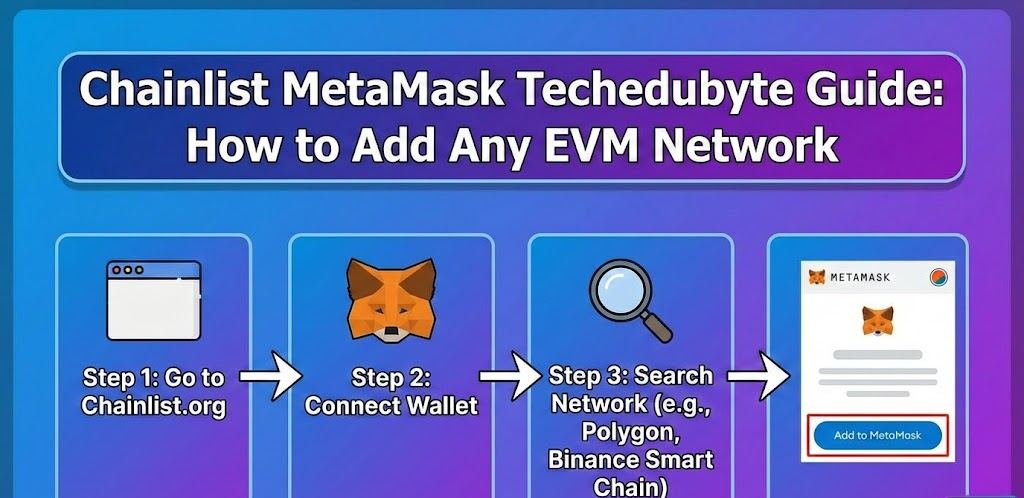
How to Add Any EVM Network to MetaMask Using Chainlist (Complete Steps)
Below is the exact method anyone can follow. Whether you’re using Windows, macOS, Android, or iPhone, the steps are almost the same.
Step 1 – Open MetaMask
- Open MetaMask in your browser or mobile app
- Make sure you are logged in
If it is your first time using MetaMask:
- Create a wallet
- Secure the seed phrase
- Never share your seed phrase with anyone
Step 2 – Visit the Official Chainlist Website
Go to:
https://chainlist.org
Important: There are fake sites pretending to be Chainlist. Only use the correct one.
Quick Safety Check
Before using the site:
- Look for HTTPS
- Check the domain spelling
- Avoid clicking on random ads that look similar
Step 3 – Connect MetaMask to Chainlist
Click the “Connect Wallet” button.
From MetaMask, you will see:
- A popup asking for approval
- Click Next → Connect
Your wallet is now linked to Chainlist.
Step 4 – Search for the Network You Want
At the top of Chainlist, type the name of the network, for example:
- “BNB Chain”
- “Polygon”
- “Avalanche”
- “Fantom”
Chainlist will show the correct result.
Step 5 – Click “Add to MetaMask”
When you see the network you want:
- Click “Add to MetaMask”
- MetaMask will open a window showing the network info
- Click Approve
You may then click Switch Network to start using it.
That’s it.
You have successfully added the network with no manual work.
Examples: Adding Popular Networks with Chainlist
Below are examples based on the steps we use ourselves and have tested multiple times.
How to Add BNB Chain (Binance Smart Chain)
Steps
- Open Chainlist
- Search: “BNB Chain”
- Click Add to MetaMask
- Approve and switch
Correct Network Information (Auto-Filled)
- Chain ID: 56
- Symbol: BNB
- RPC URL and Explorer are verified
This takes about 20–30 seconds.
How to Add Polygon Mainnet
Steps
- Search: “Polygon Mainnet”
- Click Add to MetaMask
- Approve
- Switch network
No typing needed.
How to Add Avalanche C-Chain
Steps
- Search: “Avalanche C-Chain”
- Add to MetaMask
- Click Approve
Now you can use Avalanche apps like Trader Joe and Pangolin.
How to Add Arbitrum One
Search “Arbitrum One” and follow the same process.
Arbitrum can also be used for cheap Layer-2 transactions on Ethereum.
What to Do If Chainlist Cannot Connect to MetaMask
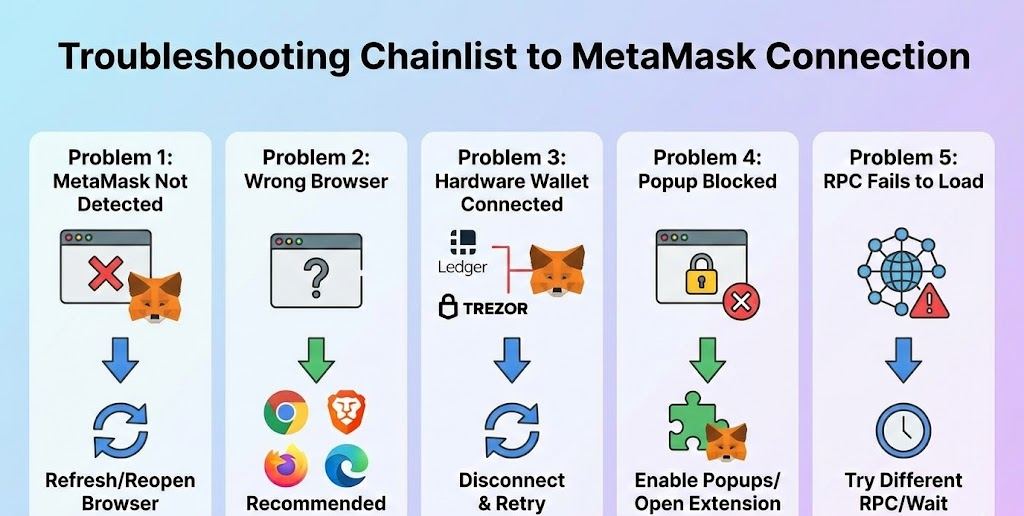
Sometimes users face connection errors. Below are common problems and solutions.
Problem 1 – MetaMask Not Detected
Solution:
Refresh the page or reopen your browser.
Problem 2 – Wrong Browser
Chainlist does not work with some browsers.
Recommended Browsers
- Chrome
- Brave
- Firefox
- Edge
Problem 3 – Hardware Wallet Connected
If you use Ledger or Trezor inside MetaMask, the signer may block network changes.
Disconnect and retry.
Problem 4 – Popup Blocked
If nothing appears:
- Enable popups from the browser
- Click the small puzzle extension icon and open MetaMask manually
Problem 5 – RPC Fails to Load
Try a different RPC from Chainlist or wait a few minutes.
Manual vs Chainlist: Which Method Is Better?
If you are new or working fast, Chainlist is better.
If you are an advanced user who manages multiple RPCs manually, you may prefer manual entry.
Comparison
| Feature | Chainlist | Manual |
|---|---|---|
| Setup Speed | 10–30 seconds | 3–10 minutes |
| Typing Required | None | Yes |
| Safety Against Fake RPCs | Higher | Depends on the source |
| Beginners | Perfect | Sometimes confusing |
| Experts | Still useful | Sometimes preferred |
Expert-Style Tips (Based on Real DeFi Experience)
Below are tips used by many professional traders and DeFi users.
1. Never Copy RPC URLs from Random Blogs
Some fake blogs publish RPCs that track your transactions or reroute requests.
Chainlist avoids that problem.
2. Always Check Gas Fees Before Sending Tokens
Different networks have different fees. For example:
| Network | Typical Gas Fee |
|---|---|
| BNB Chain | Very low |
| Polygon | Very low |
| Ethereum Mainnet | Can be high |
| Arbitrum | Lower than ETH |
| Avalanche | Moderate |
Checking fees saves you from expensive transactions.
3. Use “Test Networks” Before Real Money
If you are new:
- Try test networks first
- Learn to send, receive, and swap tokens safely
4. Keep Backup RPCs
Sometimes official RPCs go down during:
- Network upgrades
- Heavy usage
- DDoS attacks
Having two or three RPCs saves time.
5. Do Not Add Networks From Unknown Popups
If a dApp prompts:
“Add This Network Automatically?”
Always check the details. Fake apps can trick beginners.
Chainlist is much safer because it lists verified networks.
Why Chainlist Is Good for Beginners
Many people using MetaMask feel overwhelmed the first time because:
- There are many networks
- They don’t want to make mistakes
- Searching online is tiring
- Too many fake sites exist
Chainlist solves almost all of that.
Chainlist Helps You:
- Add networks in seconds
- Avoid typing errors
- Reduce risk
- Learn faster
It also gives new users confidence because they know the RPC details are correct.
Advanced Feature: Custom RPC Selection
Chainlist sometimes shows multiple RPC options for a single network.
This is useful when:
- One RPC server is slow
- A connection fails
- Your country blocks a specific server
Example:
For Polygon, you may see:
- Public RPC
- Infura RPC
- Ankr RPC
- QuickNode RPC
You can add any of them.
If one becomes slow, switch to another.
Frequently Asked Questions
Can I Add Non-EVM Networks Like Solana or Tron?
No.
Chainlist and MetaMask only support EVM networks.
Solana and Tron require different wallets.
Is Chainlist Free?
Yes. 100% free.
Is Chainlist Safe?
Chainlist is widely used and trusted.
However, always double-check the domain name.
Do I Need to Create an Account?
No. Just connect MetaMask.
Can I Use Chainlist on Mobile?
Yes.
- iPhone
- Android
- Tablet
Just open the MetaMask browser and visit Chainlist.
Final
MetaMask is a mighty crypto wallet, but it only supports the Ethereum network by default. To use other blockchains, such as Polygon or BNB Chain, you need to add them manually. Chainlist makes this process faster and safer by giving you:
- Verified network settings
- One-click installation
- No typing or complicated data entry
Whether you are a beginner or an experienced trader, Chainlist saves time and reduces mistakes. It is one of the simplest tools for quickly connecting MetaMask to hundreds of blockchain networks.